Getting Started with MCP
- Raunak Wete
- Ai , Python
- June 1, 2025
Table of Contents
What is MCP?
MCP stands for Model Context Protocol. Think of it as a universal language that lets AI agents and models talk to each other, regardless of their underlying architecture or platform. Imagine you have a chatbot, a recommendation engine, and a document summarizer—all built with different frameworks. MCP acts as the bridge, making sure they can exchange information seamlessly.
Why does this matter? Because interoperability is the future. As AI systems become more complex, the ability to connect diverse models and agents is crucial for building robust, scalable solutions.
Why Should You Care About MCP?
- Plug-and-Play AI: Integrate new models or agents without rewriting your entire codebase.
- Scalability: Easily scale your AI infrastructure as your needs grow.
- Community and Standards: MCP is gaining traction, so learning it now puts you ahead of the curve.
Setting Up Your Own MCP Server
Let’s get our hands dirty! Here’s a step-by-step guide to building a basic MCP server in Python. (Don’t worry, you don’t need to be a Python guru to follow along.)
1. Prerequisites
- Python 3.8+
- MCP SDK
2. Install Dependencies
pip install mcp mcp[cli]
3. Create the MCP Server Skeleton
Create a file called server.py:
from mcp.server.fastmcp import FastMCP

# Create an MCP server
mcp = FastMCP("Weather Service")


# Tool implementation
@mcp.tool()
def get_weather(location: str) -> str:
    """Get the current weather for a specified location."""
    return f"Weather in {location}: Sunny, 24°C"


# Resource implementation
@mcp.resource("weather://{location}")
def weather_resource(location: str) -> str:
    """Provide weather data as a resource."""
    return f"Weather data for {location}: Sunny, 24°C"


# Prompt implementation
@mcp.prompt()
def weather_report(location: str) -> str:
    """Create a weather report prompt."""
    return f"""You are a weather reporter. Weather report for {location}?"""


# Run the server
if __name__ == "__main__":
    mcp.run()
4. Run Your Server
mcp dev server.py
Visit http://localhost:6274 to see the interactive API docs generated by FastAPI.
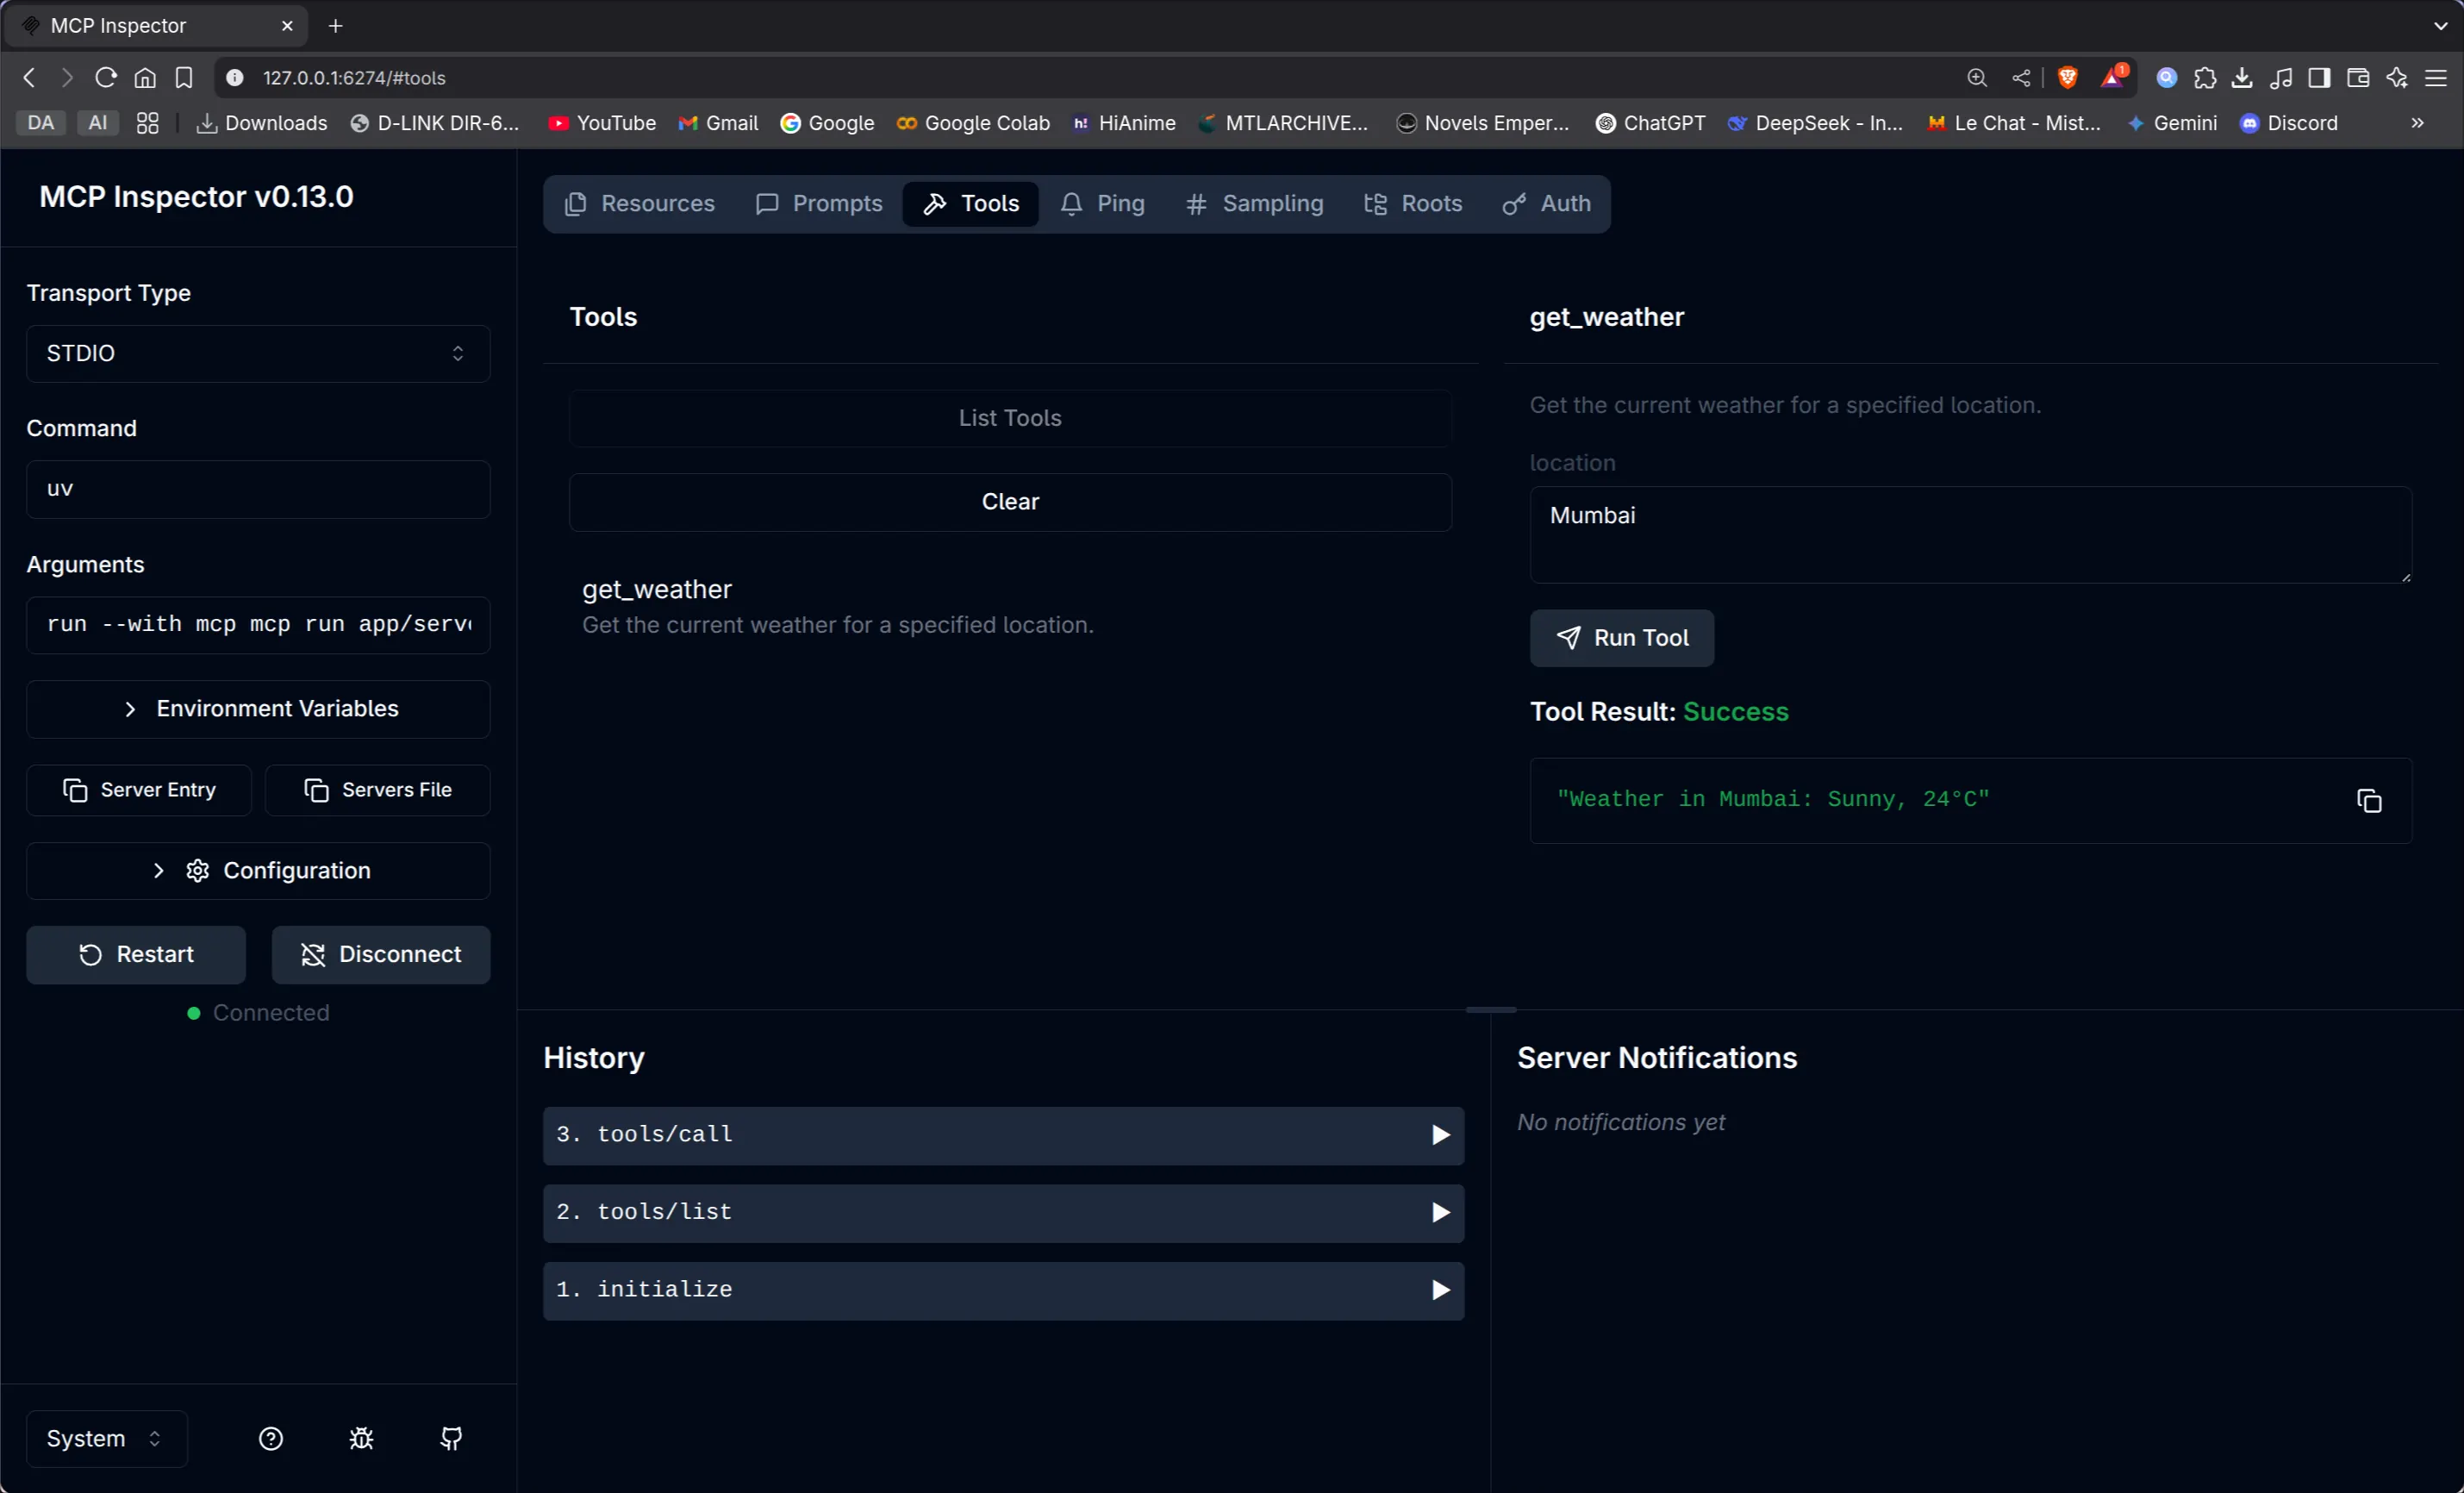
5. Inspect using MCP Inspector
When running mcp dev it will open the MCP Inspector in the web window which can be used to test the MCP server you have created.
How Does This Work?
- The MCP communicates with 2 protocols:
STDIO: The stdio transport is used for local communication, where the Client and Server run on the same machine
HTTP + SSE: The HTTP+SSE transport is used for remote communication, where the Client and Server might be on different machines
Today, we saw how to get started with MCP and set up a basic server. In the next blogs, we’ll dive deeper and learn how to add integrations to AI agents using MCP. Stay tuned!